Prerequisites
Before installing the widget, ensure you have:- The web domain where you’ll embed the agent
- Access to your website’s HTML templates or your tag manager (e.g., Google Tag Manager)
- Chat configuration completed in Agent Studio
Creating a widget
If no widgets exist, you’ll see an empty state with a Create chat widget button. Click Create chat widget to open the creation modal:A name to identify this widget (e.g., “Main website”, “Support portal”).
The URL where this widget will be deployed. The widget will only load on this domain.
Select the deployment environment: Sandbox, Pre-release, or Live.
Widget editor
After creating a widget, use the editor to configure its appearance and behavior. The editor has three tabs: Styling, Content, and Embed. A live preview panel on the right shows your changes in real-time.Header controls
- Widget selector - Dropdown to switch between widgets
- Settings icon - Access widget settings
- Save and publish - Deploy changes to the selected environment
Styling tab
Customize the visual appearance of your widget.Header
The title shown in the widget header. Use your brand name or assistant name.Example: “PolyAI Assistant”
Upload a logo or image for the widget header.
Agent
The name displayed for the agent in chat messages.Example: “Support Assistant”
Upload an avatar image for the agent.
Color
Sets the color for the header and action elements. Enter a hex code or use the color picker.Example:
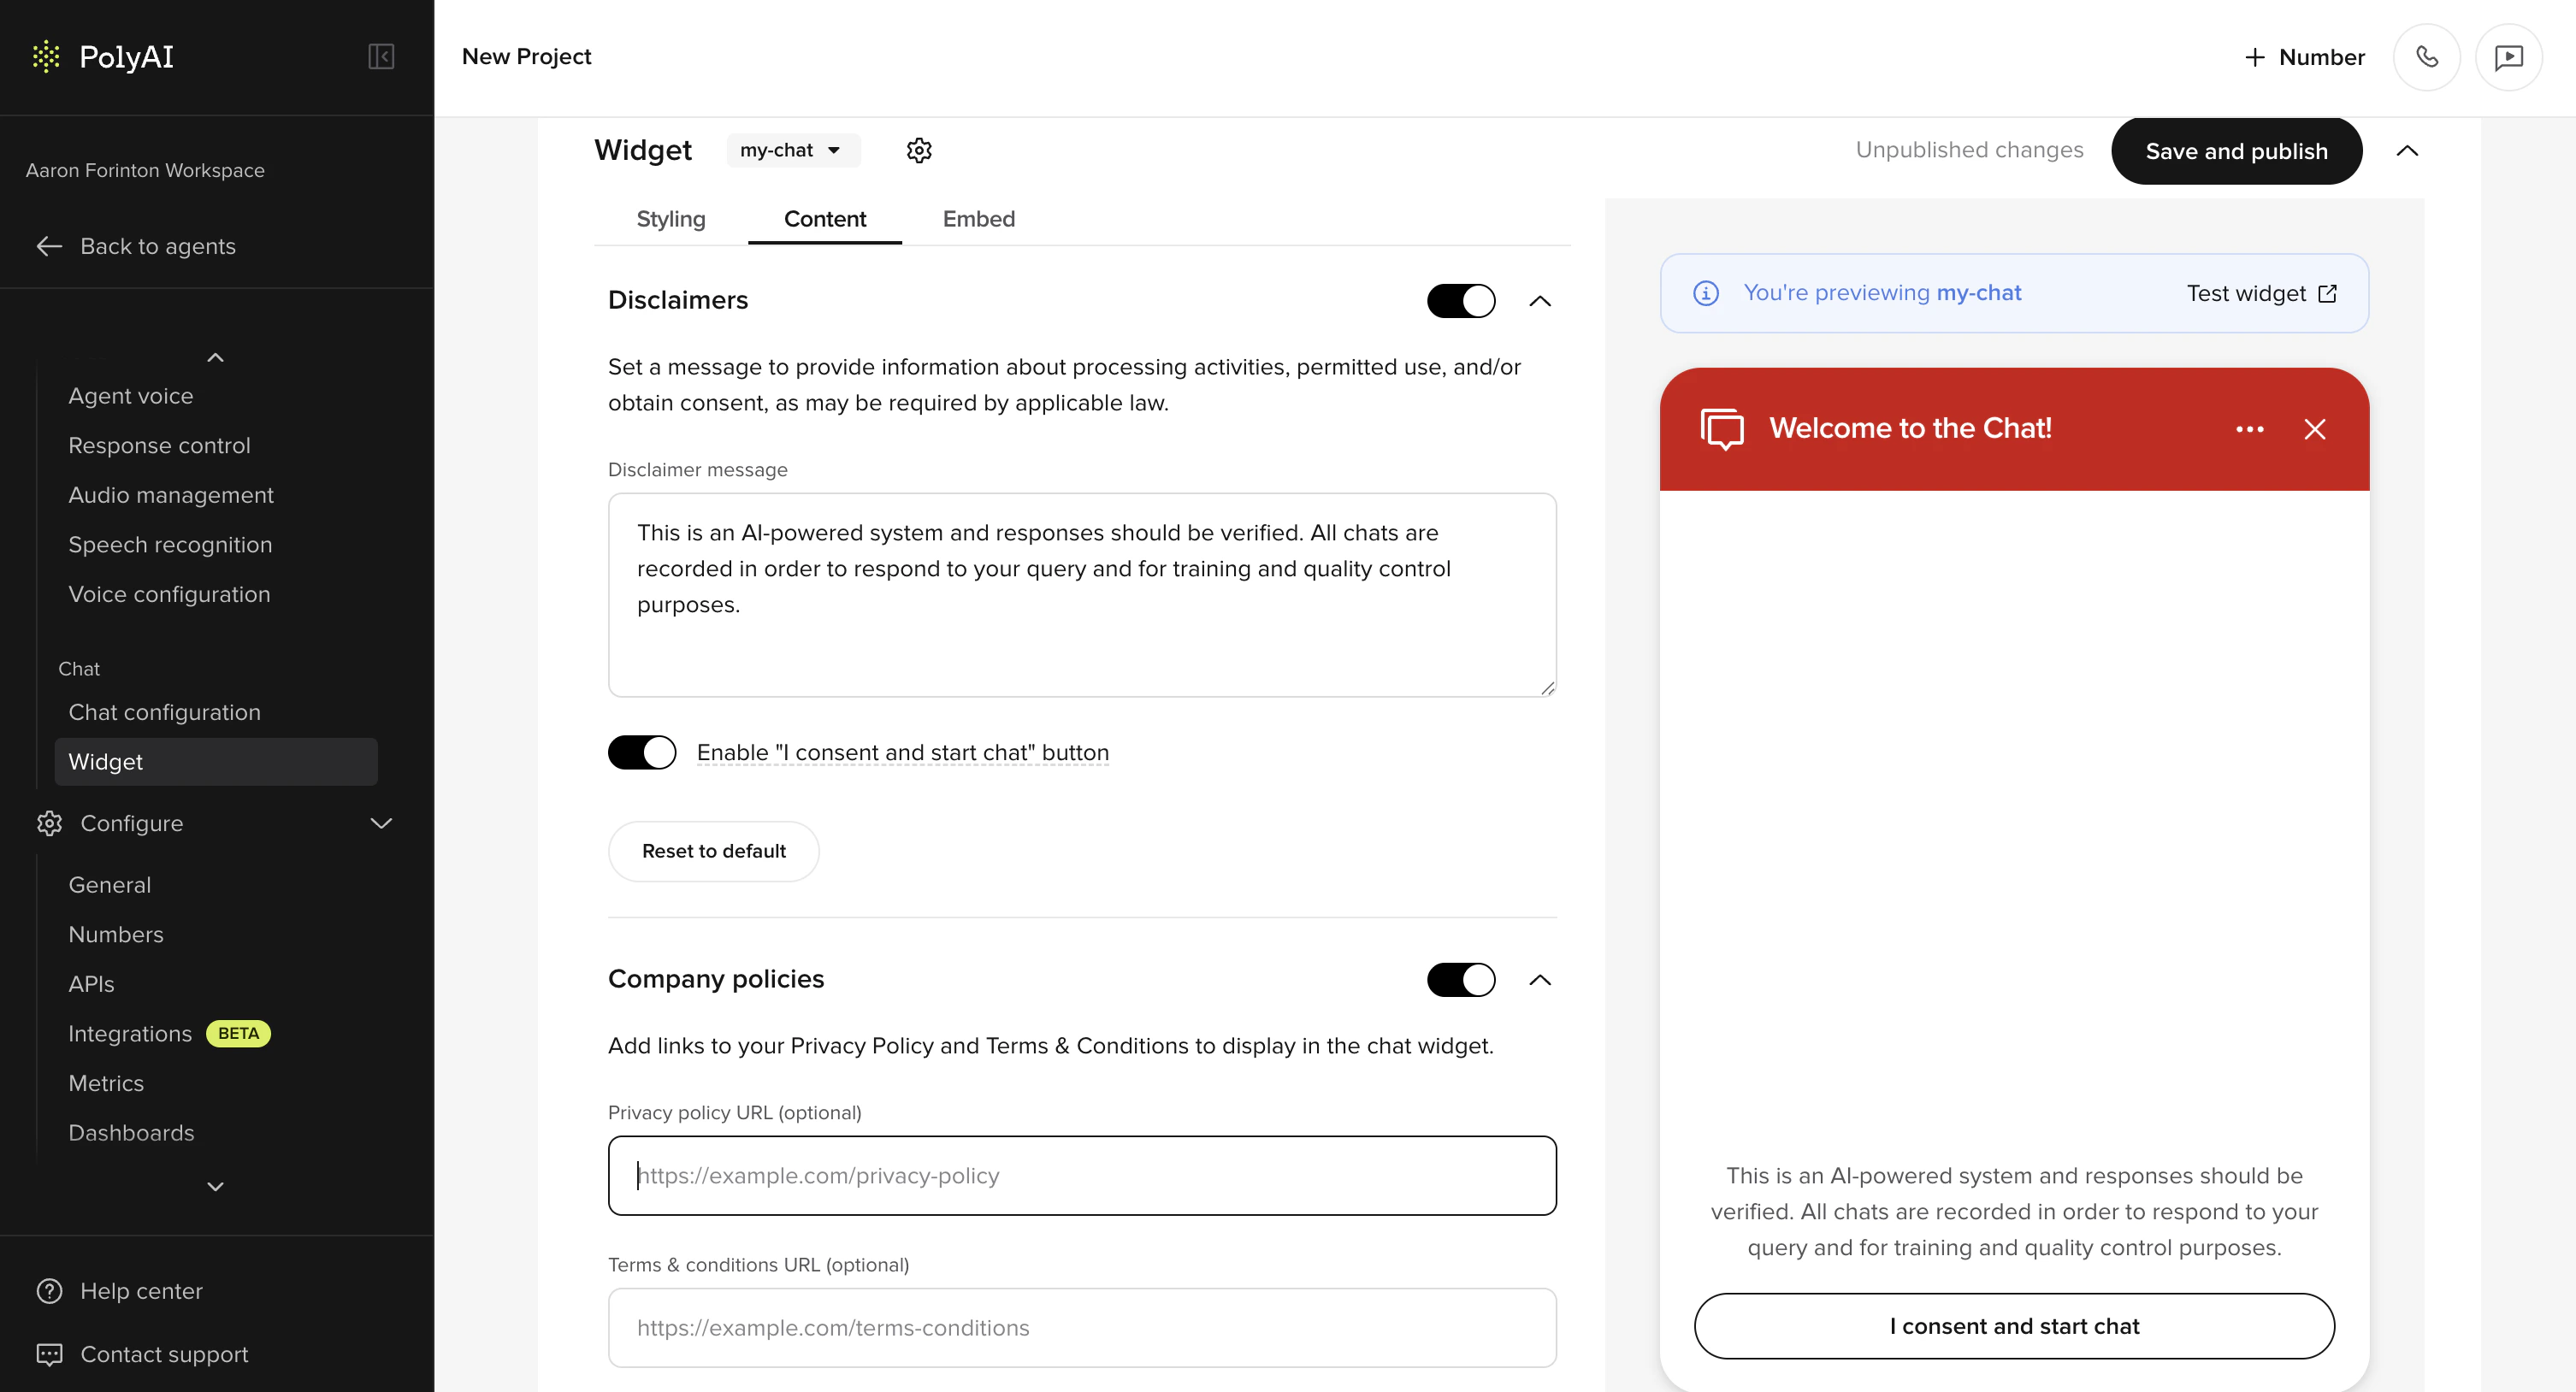
#161617Content tab
Configure disclaimers and consent requirements.Disclaimers
Toggle to show a disclaimer message before users can start chatting.
The message shown to users before they begin chatting.Example: “This is an AI-powered system. All chats are recorded for quality and training purposes.”
When enabled, users must click “I consent and start chat” before the conversation begins.
Restore the disclaimer message to its default text.
Company policies
Toggle to show links to your Privacy Policy and Terms & Conditions below the consent button.
Example:
https://example.com/privacy-policyExample:
https://example.com/terms-conditionsEmbed tab
Deploy your widget to production.Instructions
The embed tab provides step-by-step instructions for adding the widget to your website.Widget status
Each widget displays:- Widget name - The name you assigned
- Status badge - Shows “Live” when published, or the current state
- Script tag - The code to copy and embed on your site
- Last published - Timestamp of the most recent deployment
Installation
Choose one installation method:- Option A: Direct HTML embed (recommended for most sites)
- Option B: Tag Manager if your organization prefers deployments through a tag manager (e.g., Google Tag Manager)
Step 1: Generate a widget tag in Agent Studio
- Navigate to Channels > Chat in Agent Studio
- Enable Chat as a channel
- Enter the domain name you wish to publish the widget on
- Configure styling and content settings
- Click Save and publish
- Navigate to the Embed tab
- Copy the unique script tag—it should look like:
Option A: Direct HTML embed (recommended)
- Open the HTML template that loads on every page (often called your global layout, base template, or
index.html) - Paste the script tag just before the closing
</body>tag - Publish your website changes
Option B: Tag Manager (GTM)
Use this if your organization deploys scripts using Google Tag Manager or a similar tool.- In your Tag Manager, create a new Custom HTML tag
- Paste the script tag:
- Set the trigger to All Pages
- Publish the container
Verification checklist
After publishing, verify the following:Quick verification steps
- Open your website in a private/incognito window
- Hard refresh the page (
Ctrl+Shift+RorCmd+Shift+R) to bypass cached scripts - Test on:
- A desktop browser (Chrome or Edge)
- A mobile device (iOS Safari or Android Chrome)
Troubleshooting
Widget does not appear
Possible causes:
- The snippet is not loading on that page
- The script is blocked by a Content Security Policy (CSP)
- An ad blocker or privacy extension is blocking the script
- Tag Manager or website code has syntax errors (missing quotes, unclosed tags)
- Confirm the snippet is present in the page source and placed before
</body> - Temporarily disable ad blockers and retry
- Open Developer Tools → Console tab and look for script load errors
- Verify any Tag Manager configuration has proper punctuation and syntax
CSP or security headers block the widget
If your site uses Content Security Policy (CSP), your policy may need to allow the widget script.What to try:
- Ask your web team to add the widget CDN domain to your CSP allowlist
- Check your CSP header for
script-srcdirectives that may block external scripts - If your CSP is strict, you may also need to allow any required destinations used by the widget
If your organization requires a formal security review, share your CSP errors and current CSP header with PolyAI support.
Cookie consent banner overlaps the widget
iFrame or embed restrictions
If your website is primarily rendered inside an iFrame, some browser rules can restrict behavior.What to try:
- Test the widget on the top-level page (not embedded in an iFrame)
- Check your iFrame
sandboxattributes and whether scripts and top navigation are allowed
tel: links do not launch calls
Possible causes:
- Desktop browsers may not have a default calling app
- Some managed devices block
tel:links
- Test on a mobile device
- Confirm your number is valid and in international format
- Verify device policies allow phone links
QR code does not scan
Possible causes:
- Low contrast or too small on mobile
- Camera permissions or scanner limitations
- Increase the QR size (if configurable)
- Test with a different scanner app
- Ensure screen brightness is sufficient
Ad blockers prevent loading
What to try:
- Confirm the issue reproduces with extensions disabled
- If your audience often uses ad blockers, consider adding installation guidance to your help center
Best practices
Placement and UX
- Place the widget in a bottom corner and keep it consistent across pages
- Avoid overlapping key UI elements:
- Cookie banners
- Accessibility controls
- “Back to top” buttons
- Mobile navigation
- If you use a sticky footer, test the widget on mobile to ensure it remains tappable
Performance
- Load the widget asynchronously (the snippets above do this by default)
- Avoid duplicating the snippet in multiple places
- For performance-sensitive sites, consider loading the widget only on:
- Support and contact pages
- High-intent pages (checkout, booking, etc.)
Privacy and security
- Only include the widget on domains you control
- Review your privacy policy to ensure it covers chat interactions
- If you use cookie consent, confirm whether chat functionality should wait until consent is granted
Testing
Live preview
The preview panel on the right side of the editor shows:- “You’re previewing [widget name]” banner
- Test widget link to interact with the widget
- Real-time updates as you adjust settings
Managing multiple widgets
You can create multiple widgets for different use cases:- Different websites or domains
- Different variants for location-specific experiences
- Different environments for testing vs. production
Support
If you contact support, include:- The affected page URL(s)
- The date and time the issue occurred
- Browser and version (e.g., Chrome 122)
- Device and OS (e.g., iPhone 15, iOS 17)
- Whether ad blockers, VPN, or privacy tools are enabled
- A screenshot of:
- The page with the widget missing or broken
- Any errors in the browser console

